In order to bring a more delicate immersion to the VR experience, HTC Vive finally ushered in the most obvious upgrade product HTC Vive Pro two years after the release, to see how Vive official website describes it:
VIVE Pro Professional exceeds industry benchmarks for the most immersive virtual reality experience.
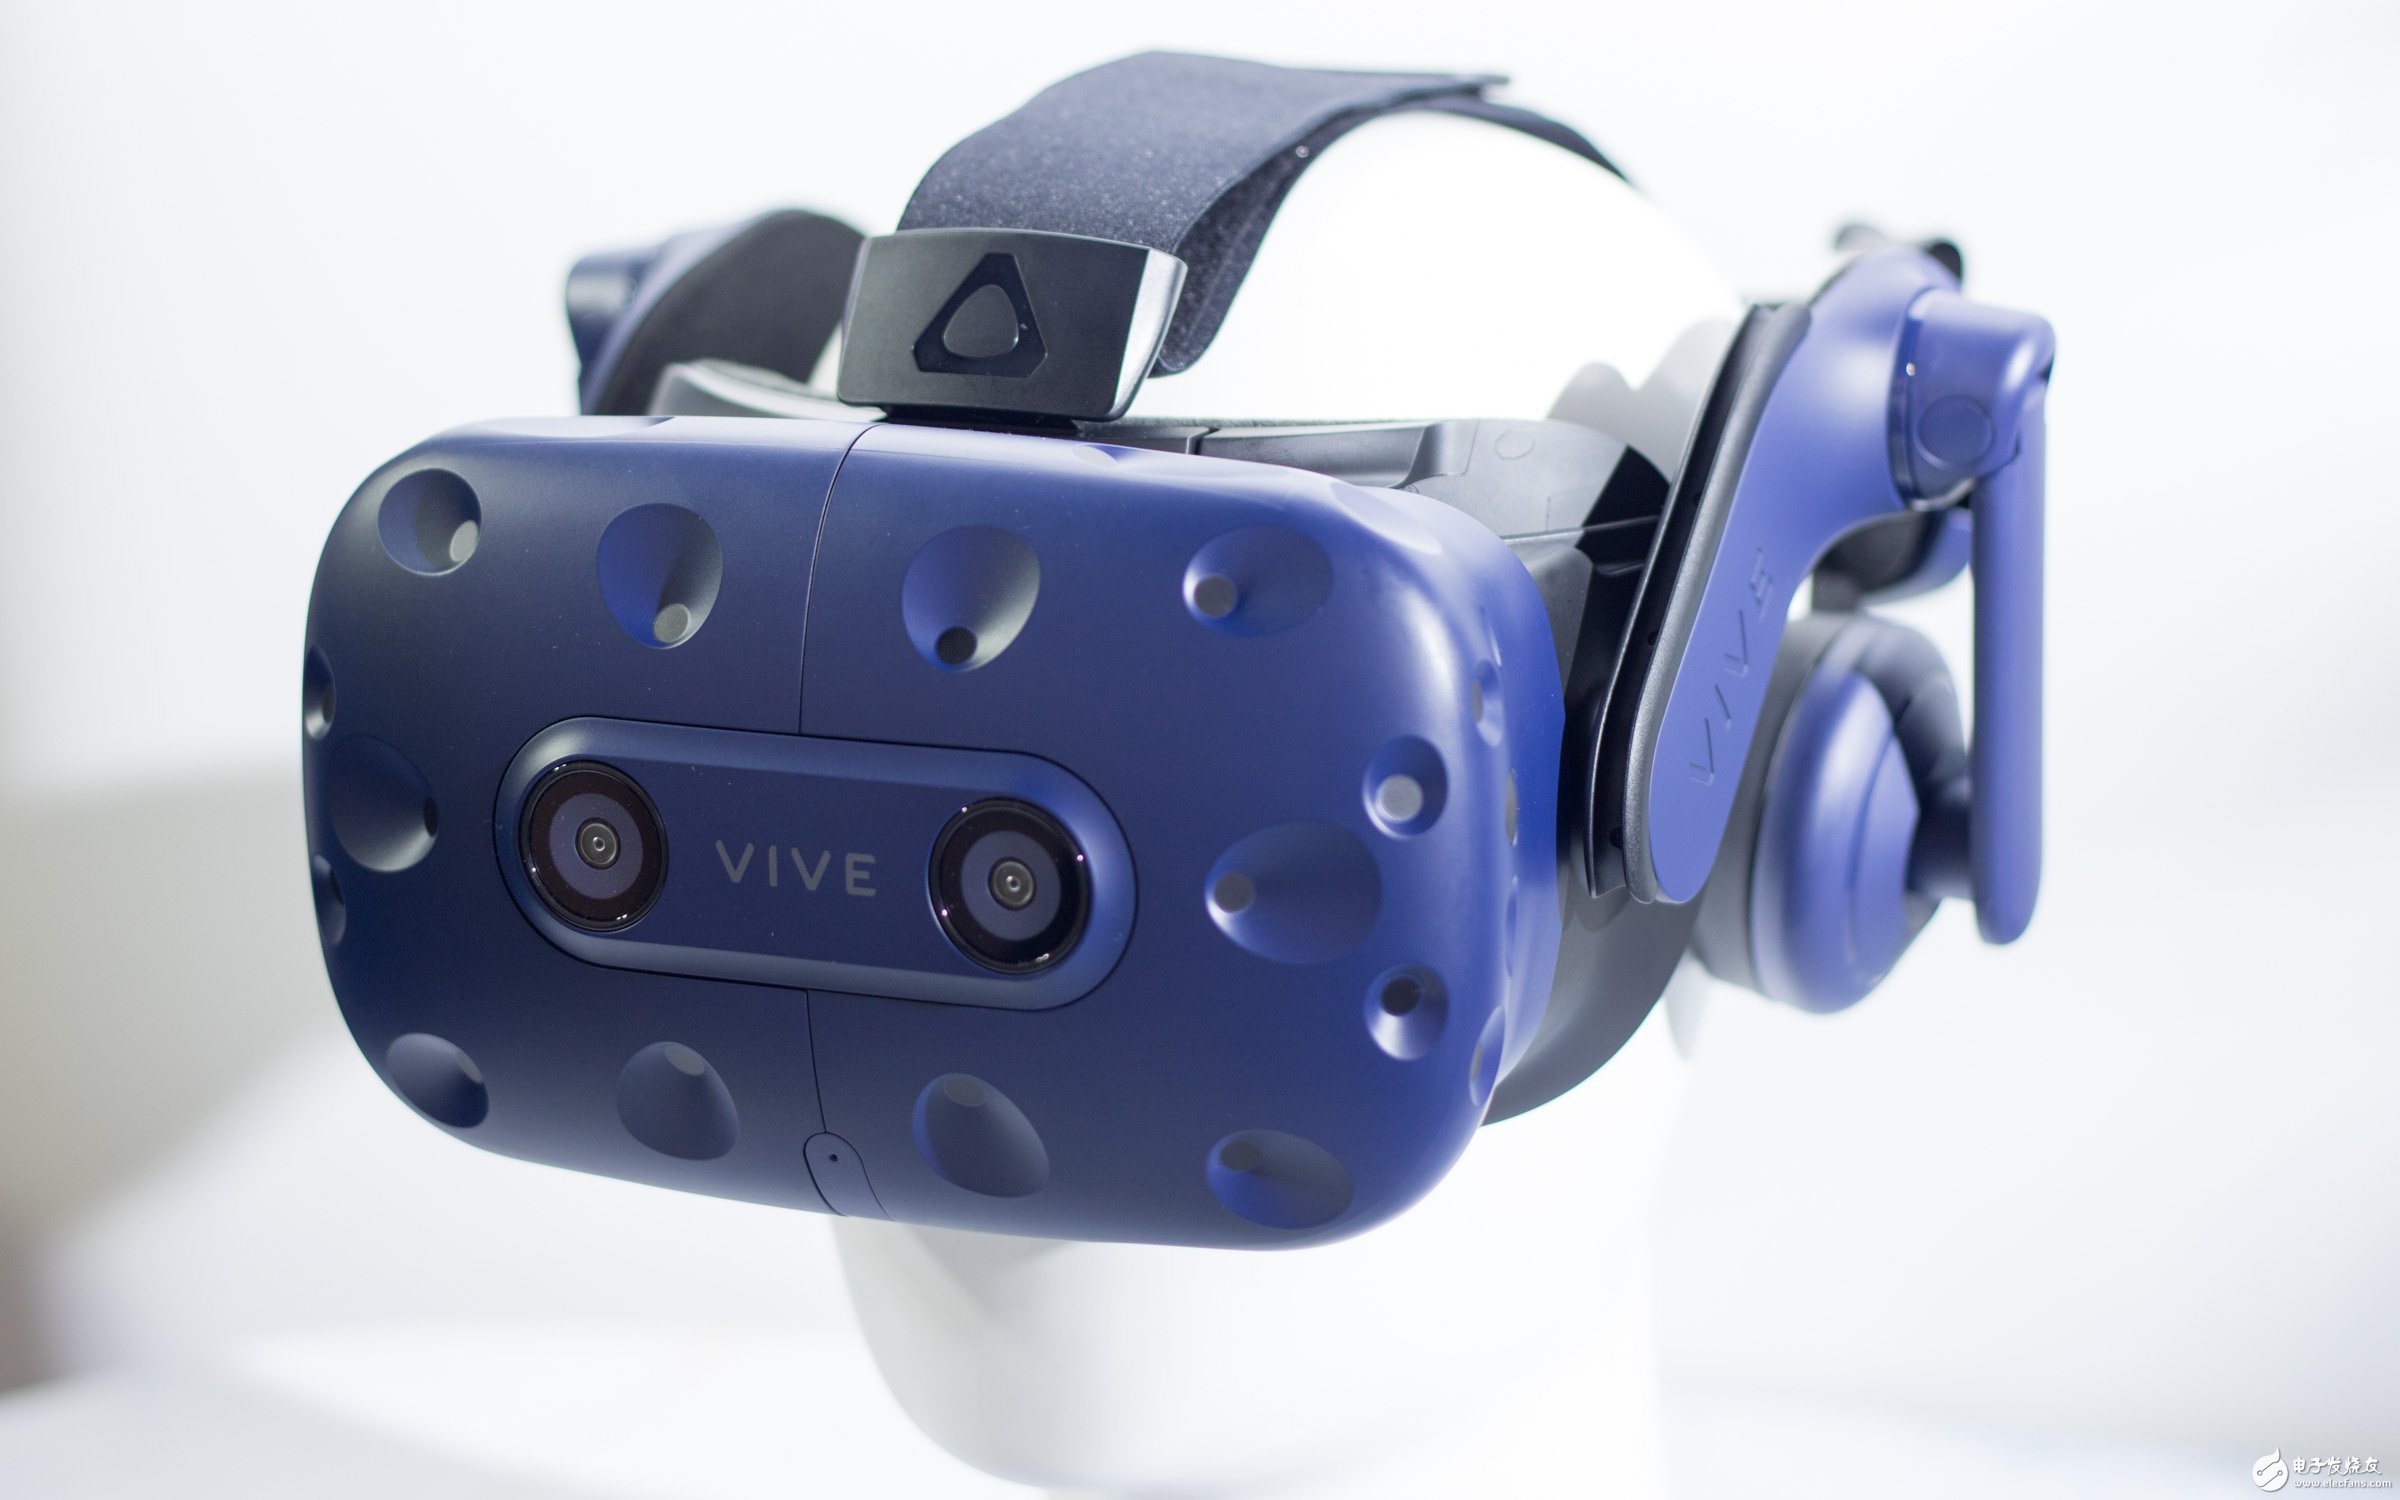
By carefully comparing the previous product HTC Vive, it is not difficult to find that HTC Vive Pro's so-called "more immersive experience" is actually built on finer resolution (2880 x 1600 monocular 1440 x 1600, 615 PPI), supporting new A low-latency, high-performance wireless kit with built-in Hi-Res Audio-certified headphones and improved head-up weight distribution.
So, what exactly is this inside the HTC port called "the VR device that surpasses the industry benchmark"? Below, we will follow the iFixit perspective to get a deeper understanding of this professional-grade VR device.
Basic configuration of HTC Vive Pro:
Two 1600 x 1440 AMOLED displays for 2880 x 1600 resolution
90 Hz screen refresh rate
Built-in dual front camera, dual microphone and detachable headphones
Includes SteamVR Tracking Technology 2.0, G-sensor Calibration, Gyroscope Gyro, Proximity Distance Sensor, Pitch Sensor
Support for new wireless kits
Prior to disassembly, iFixit routinely used CreaTIve Electron's X-ray imaging tools to peer into the HTC Vive Pro.
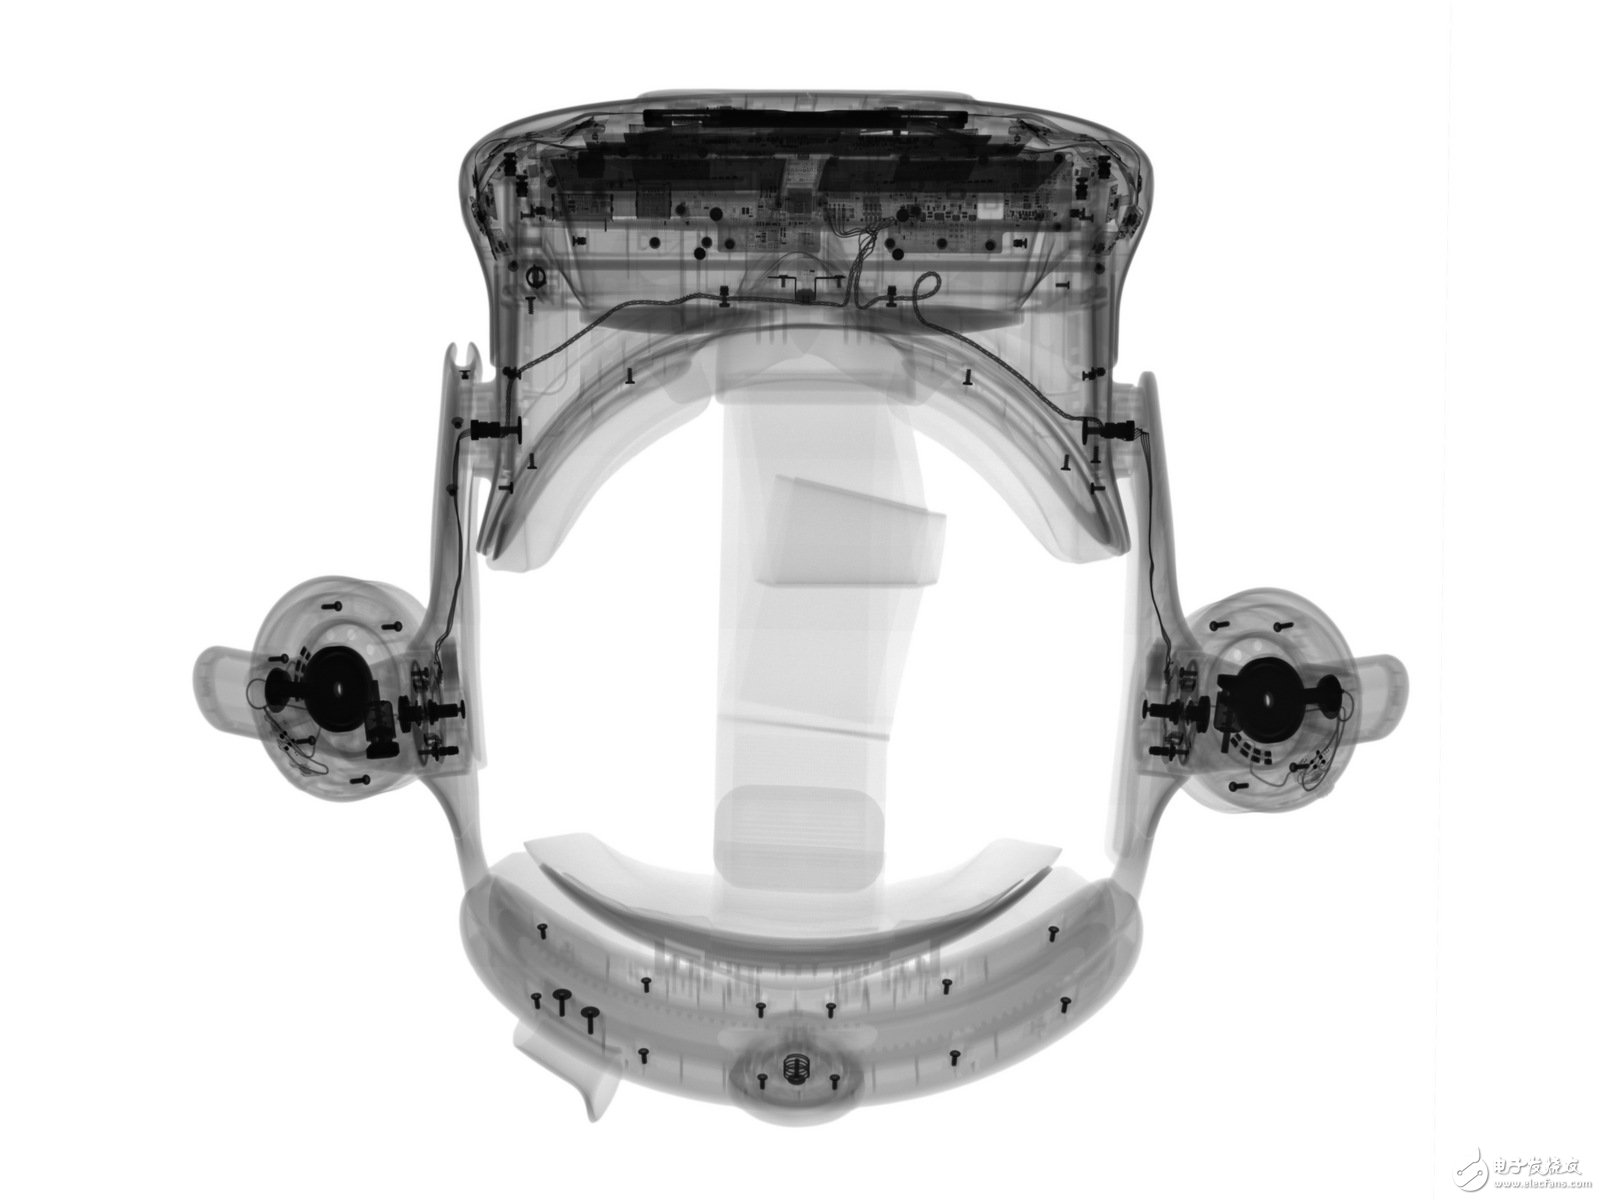
Through this X-ray perspective, we can see that the internal structure and routing layout of the Vive Pro have been adjusted compared to Vive, but most of the internal components are still connected by screws, that is to say The Vive Pro is still as easy to disassemble as the Vive.
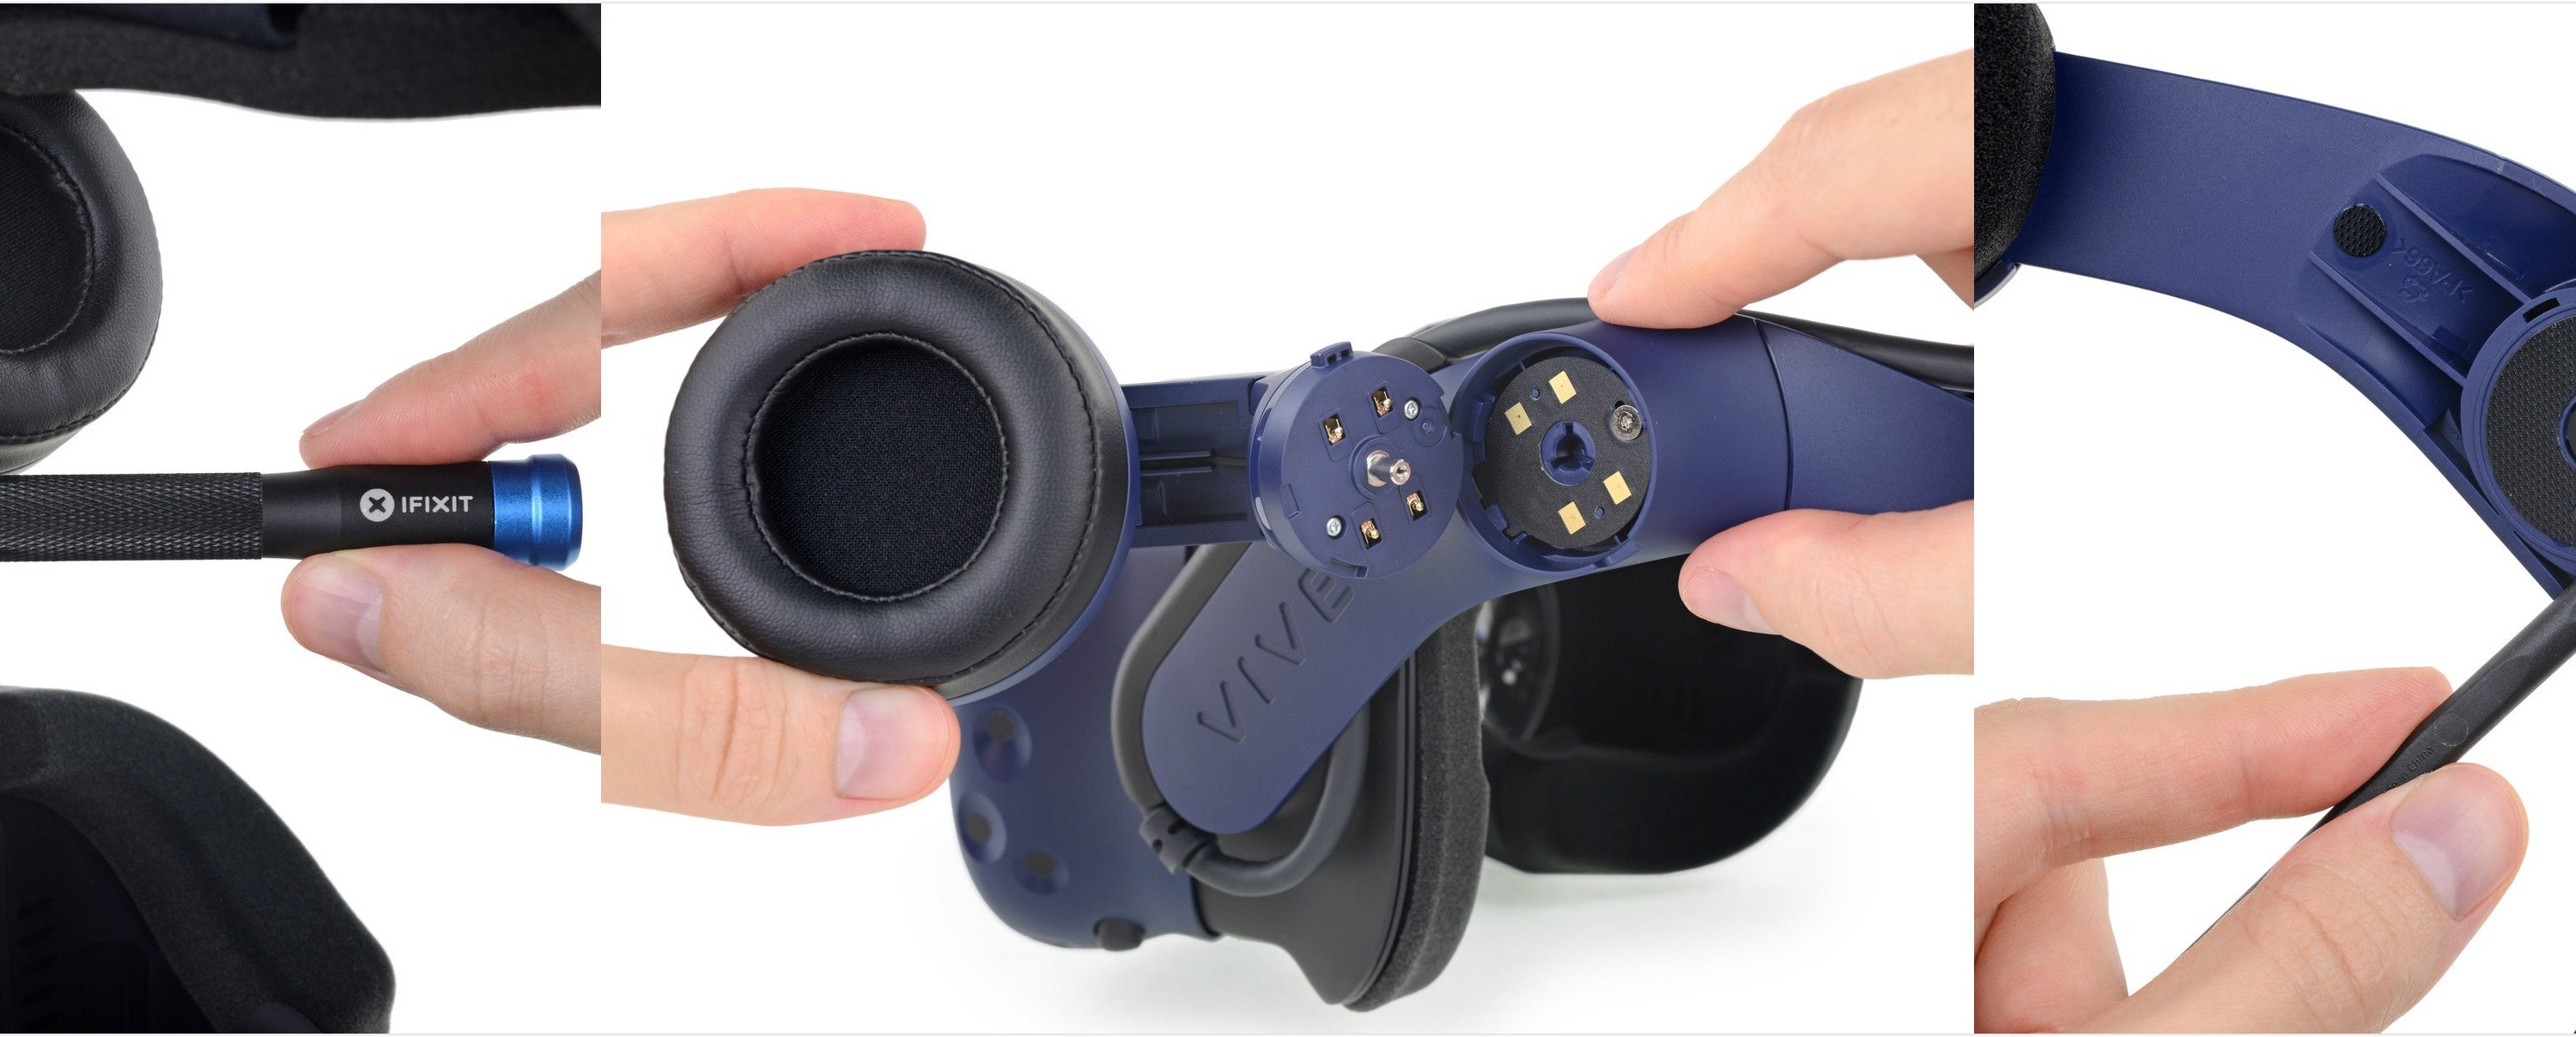
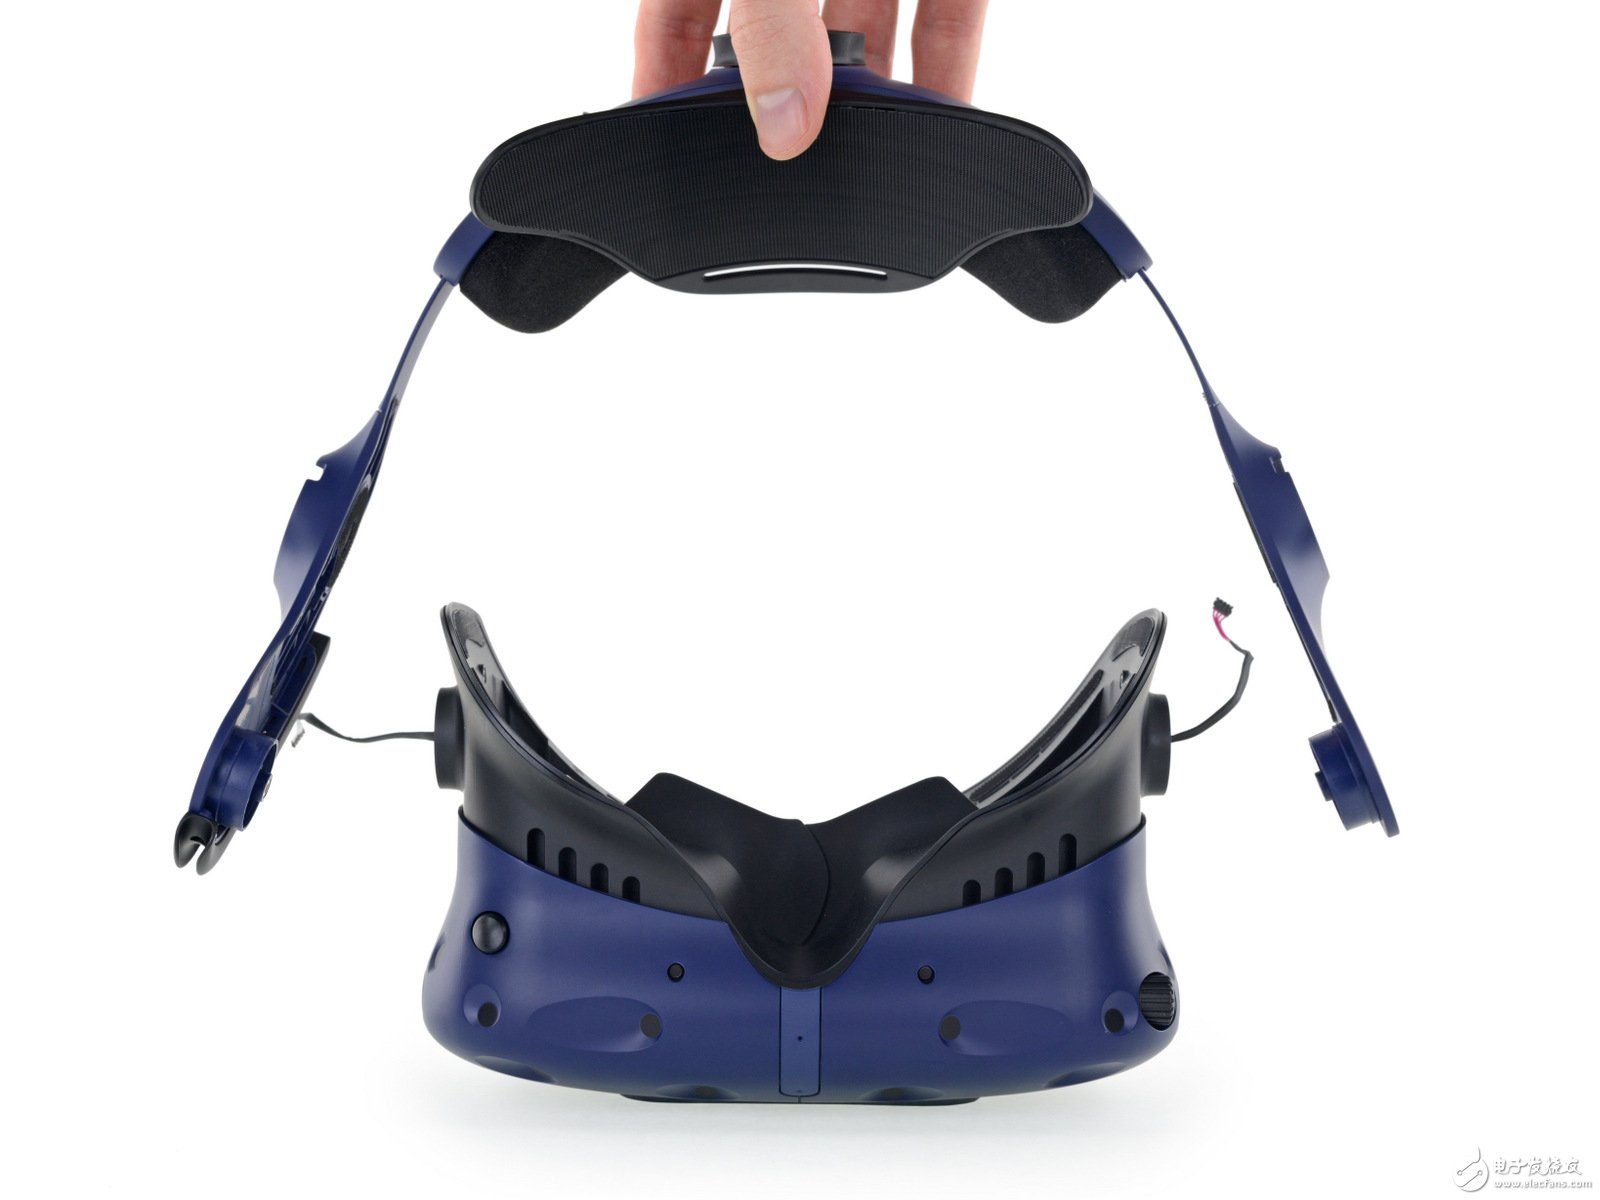
First open the inner sponge pad, use a Phillips screwdriver to unscrew the screw, unload the headphones on both sides of the Vive Pro (innovated by the manufacturer), then unplug the cable connecting the headphones, and remove the screws on the left and right sides of the head display. , you can initially disassemble the Vive Pro into two parts.

Screw the top and bottom screws and use the paddles to pry open the Vive Pro splicing case. The interior of the Vive Pro is exposed in front of us. Just like the previous Vive, its interior is still full of dense lines.
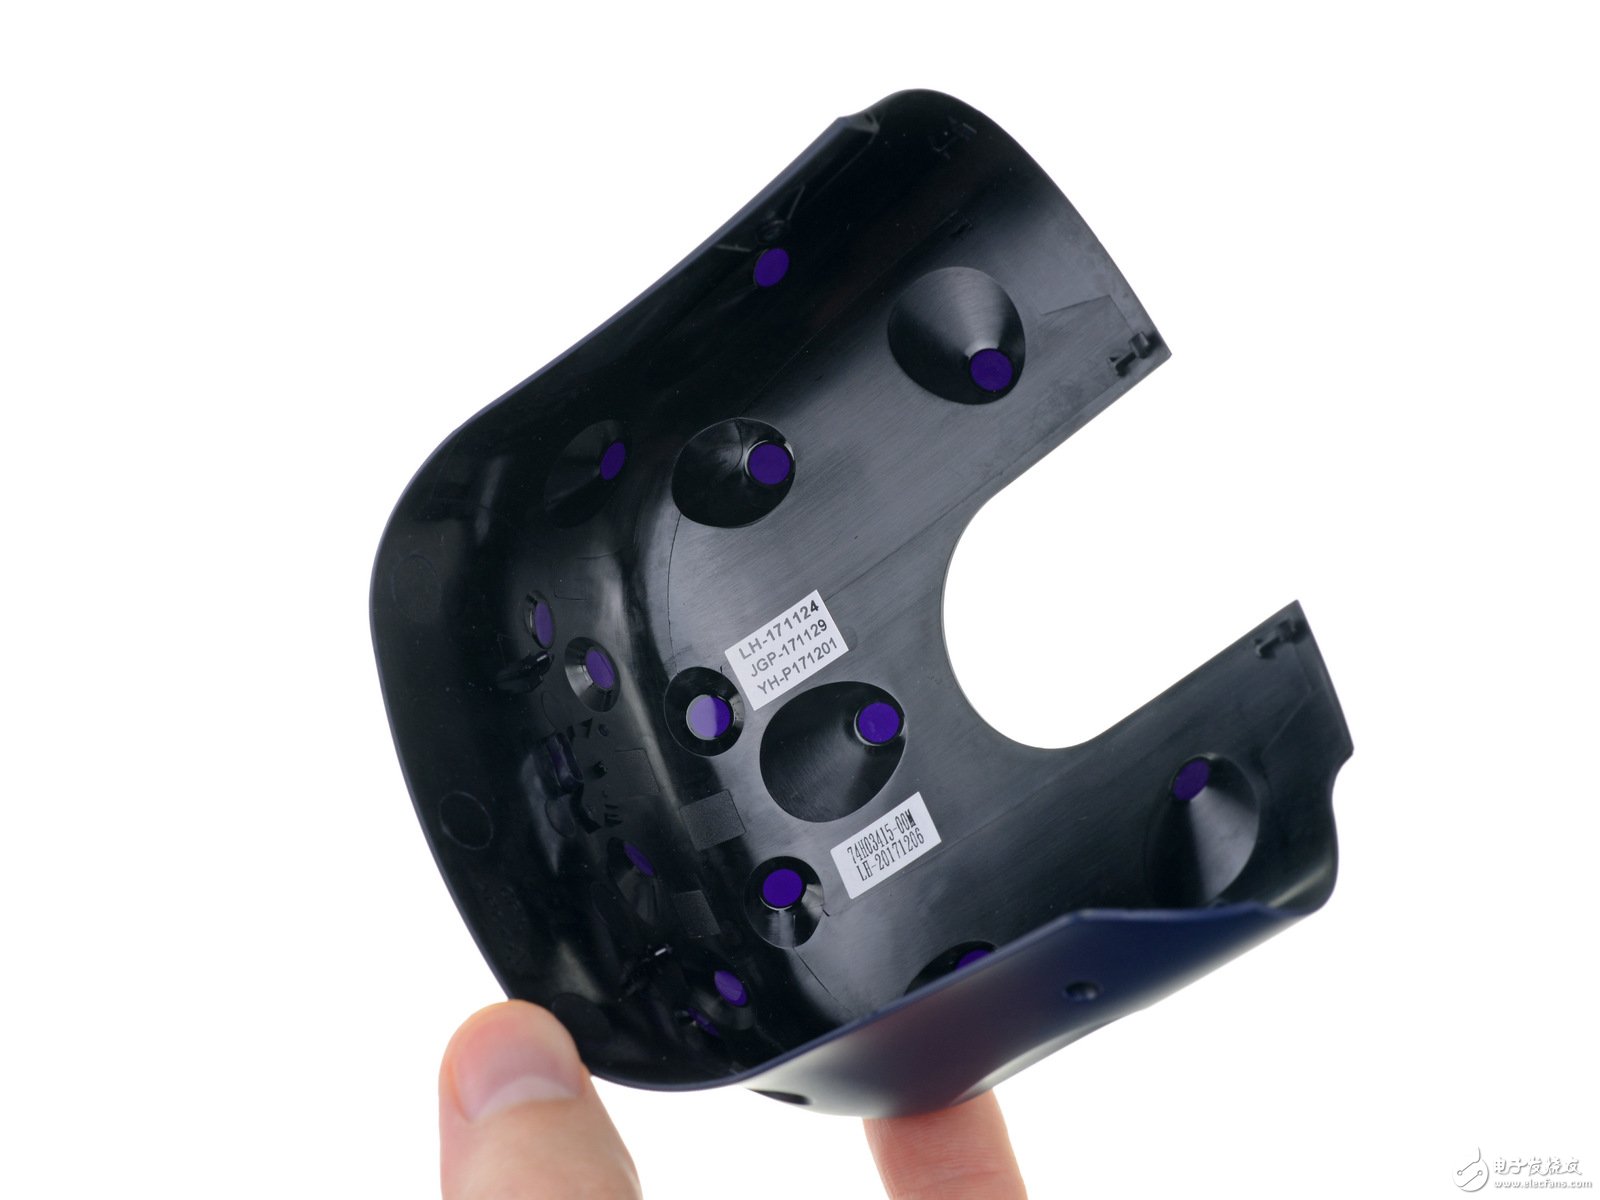
It is worth mentioning that the recessed holes we see on the surface of the Vive Pro are actually infrared receivers with filters on the housing to filter visible light, and receivers to receive infrared light from the base station. Compared to the Oculus Rift, the two work the opposite.
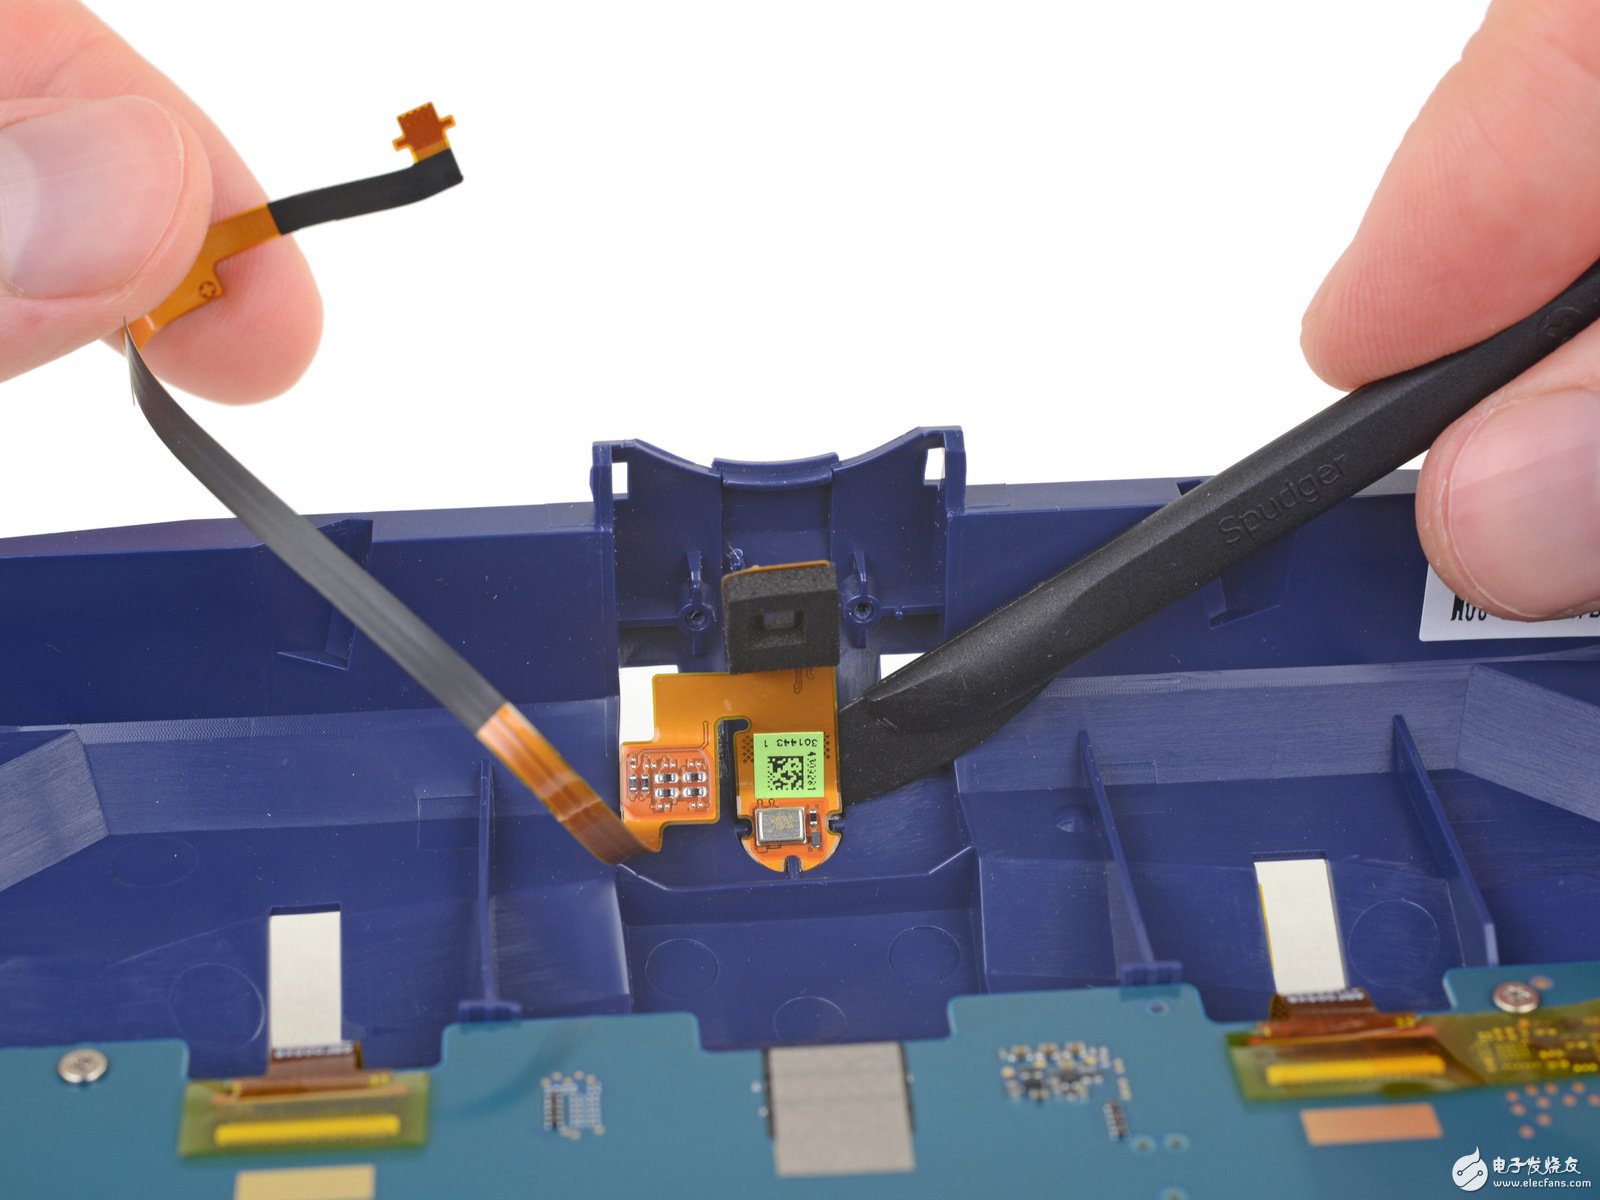
Next, you need to remove the dual-microphone assembly on the head. At this time, you need to use the hot air blower and the flat head tamper. These operations need to be careful, otherwise the microphone assembly will be damaged.
Once the microphone is removed, the motherboard, camera, infrared sensor and other components on the panel are easier to separate.
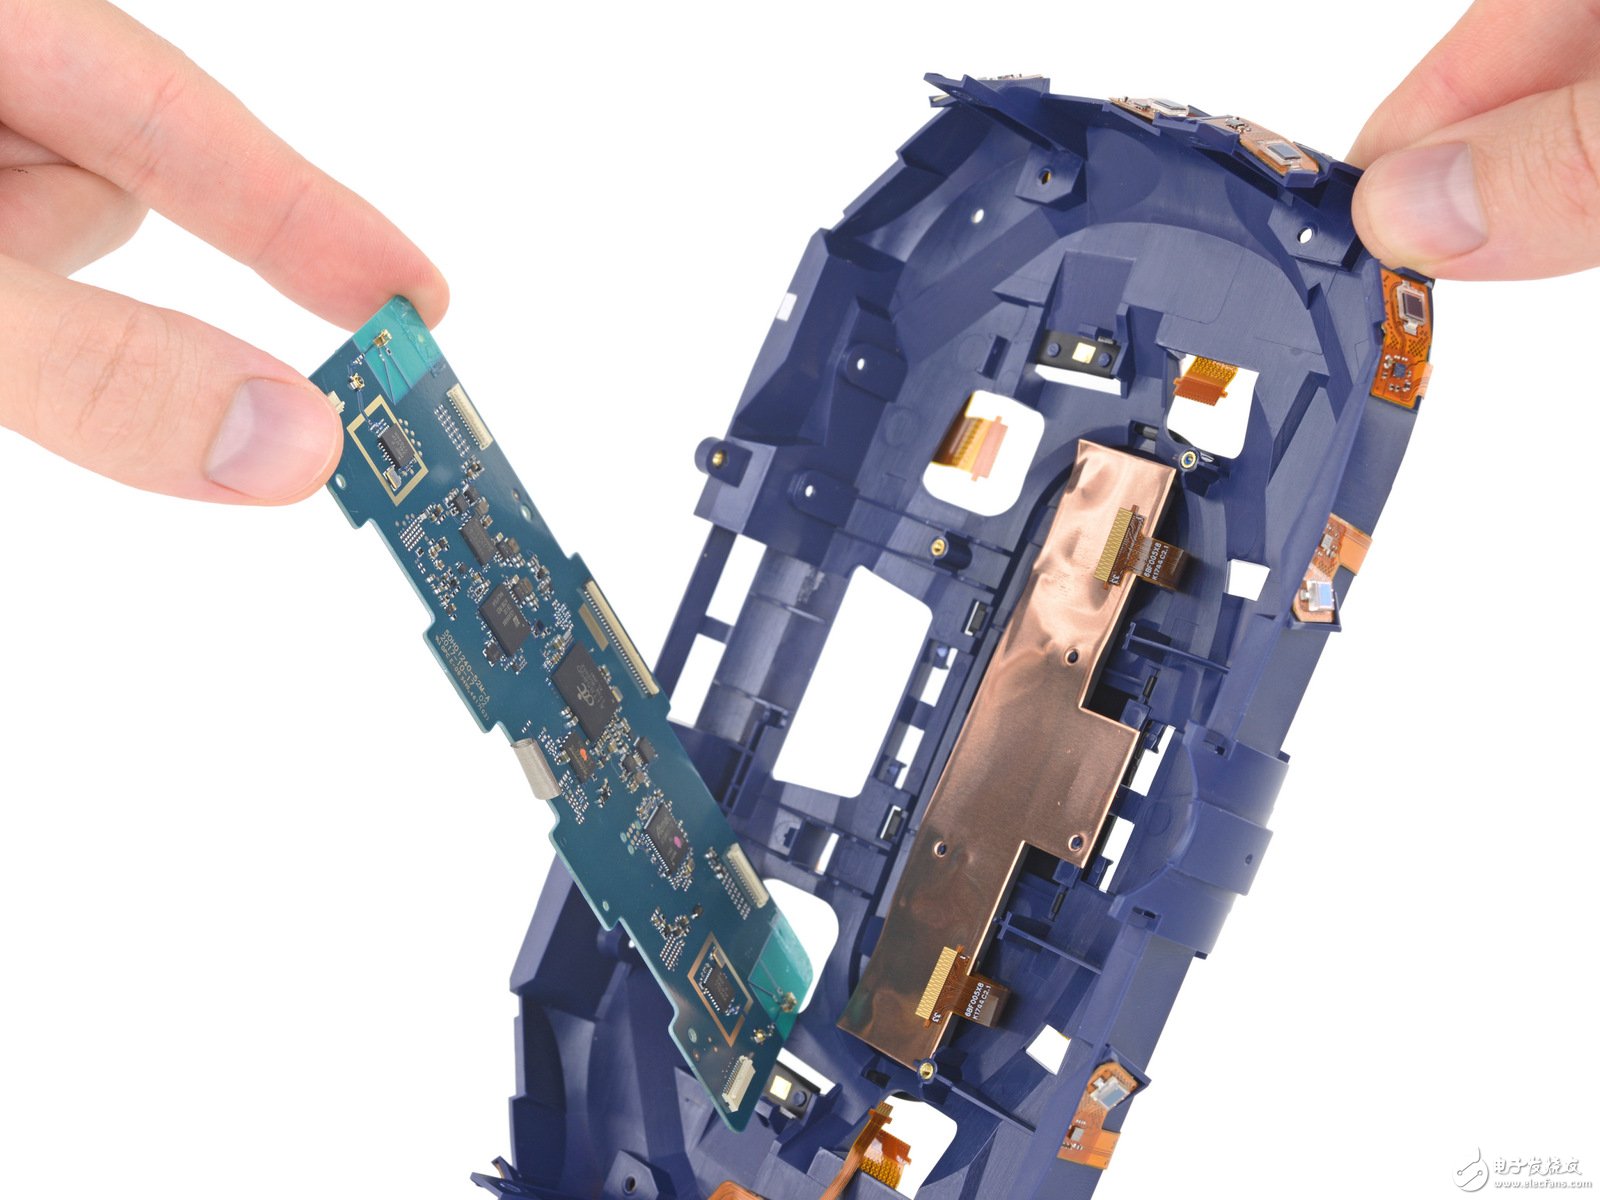
(There is a piece of copper foil on the back of the board for EMI shielding and passive cooling)

(Two cameras for Vive Pro)
Let's first take a look at the motherboard design of the Vive Pro.
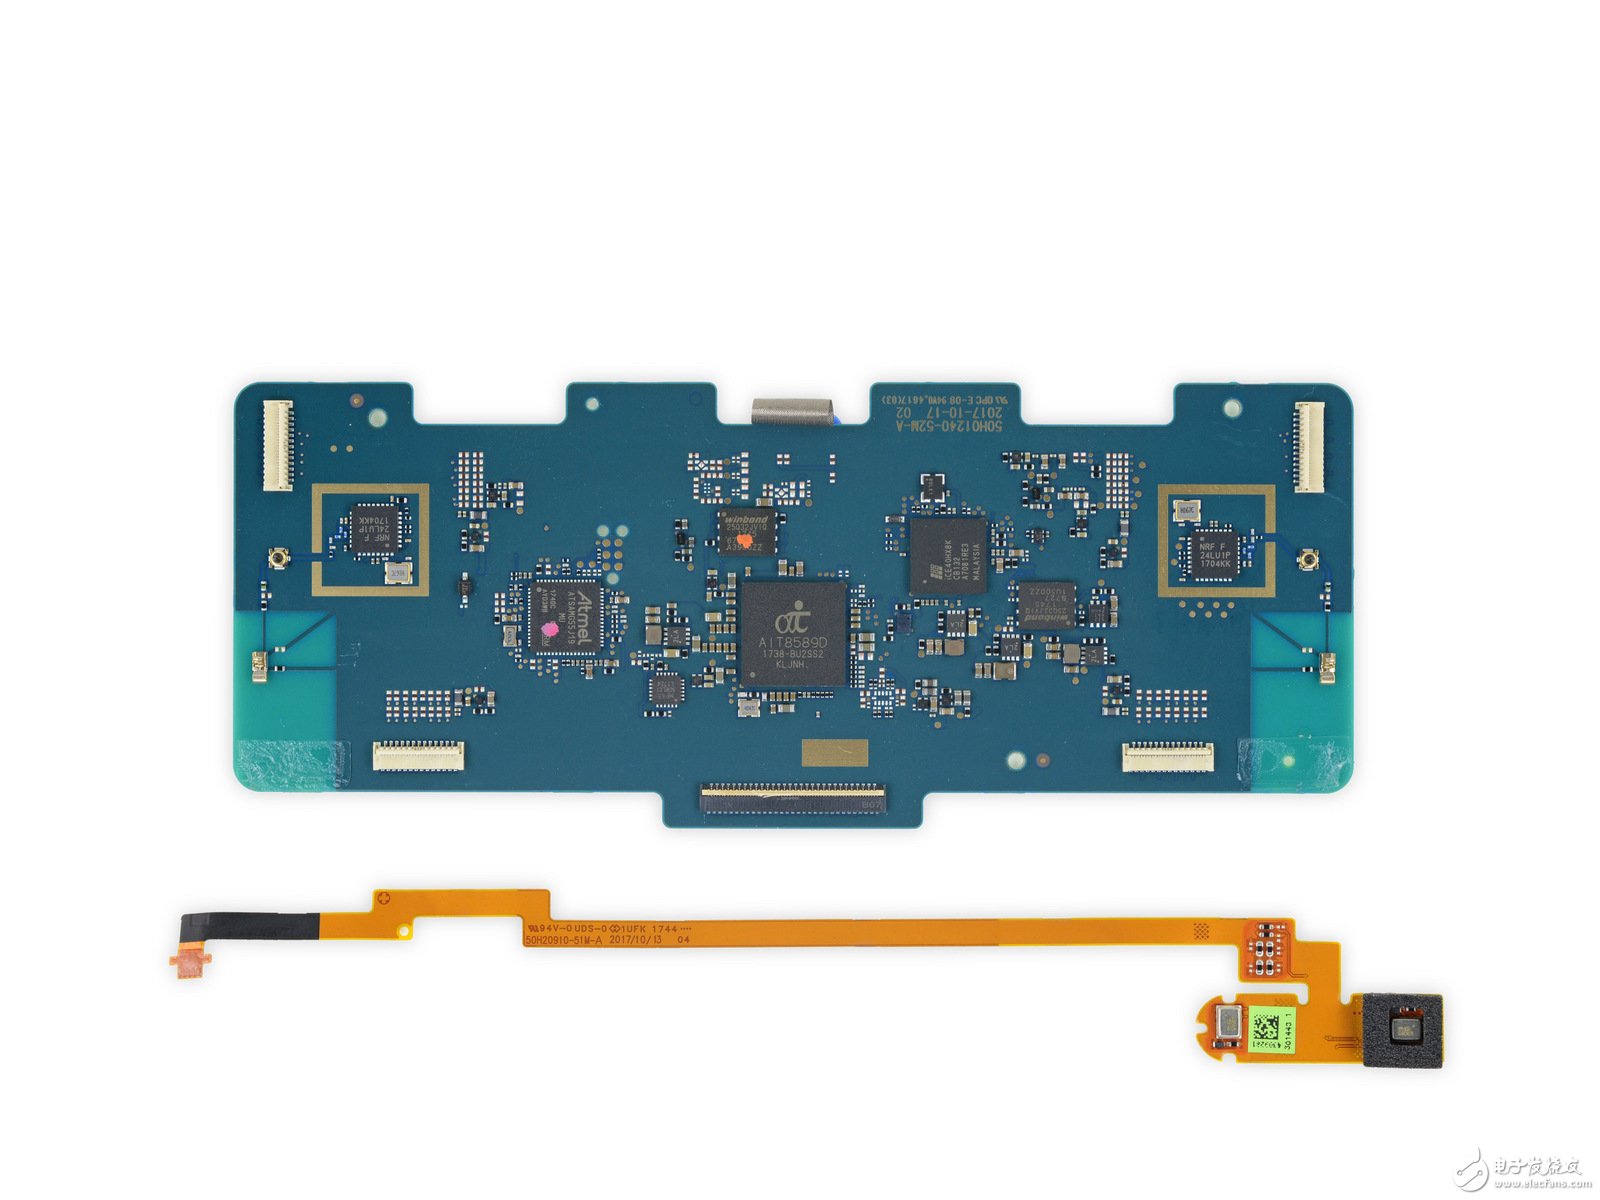
Two Nordic Semiconductor NRF24LU1P 2.4 GHz RF chips
Atmel SAM G55J 32-bit microcontroller
Two Winbond 25Q32JV1Q 4MB flash memories
Alpha Imaging Technology AIT8589D Image Signal Processor
LatTIce Semiconductor iCE40HX8K Low Power FPGA
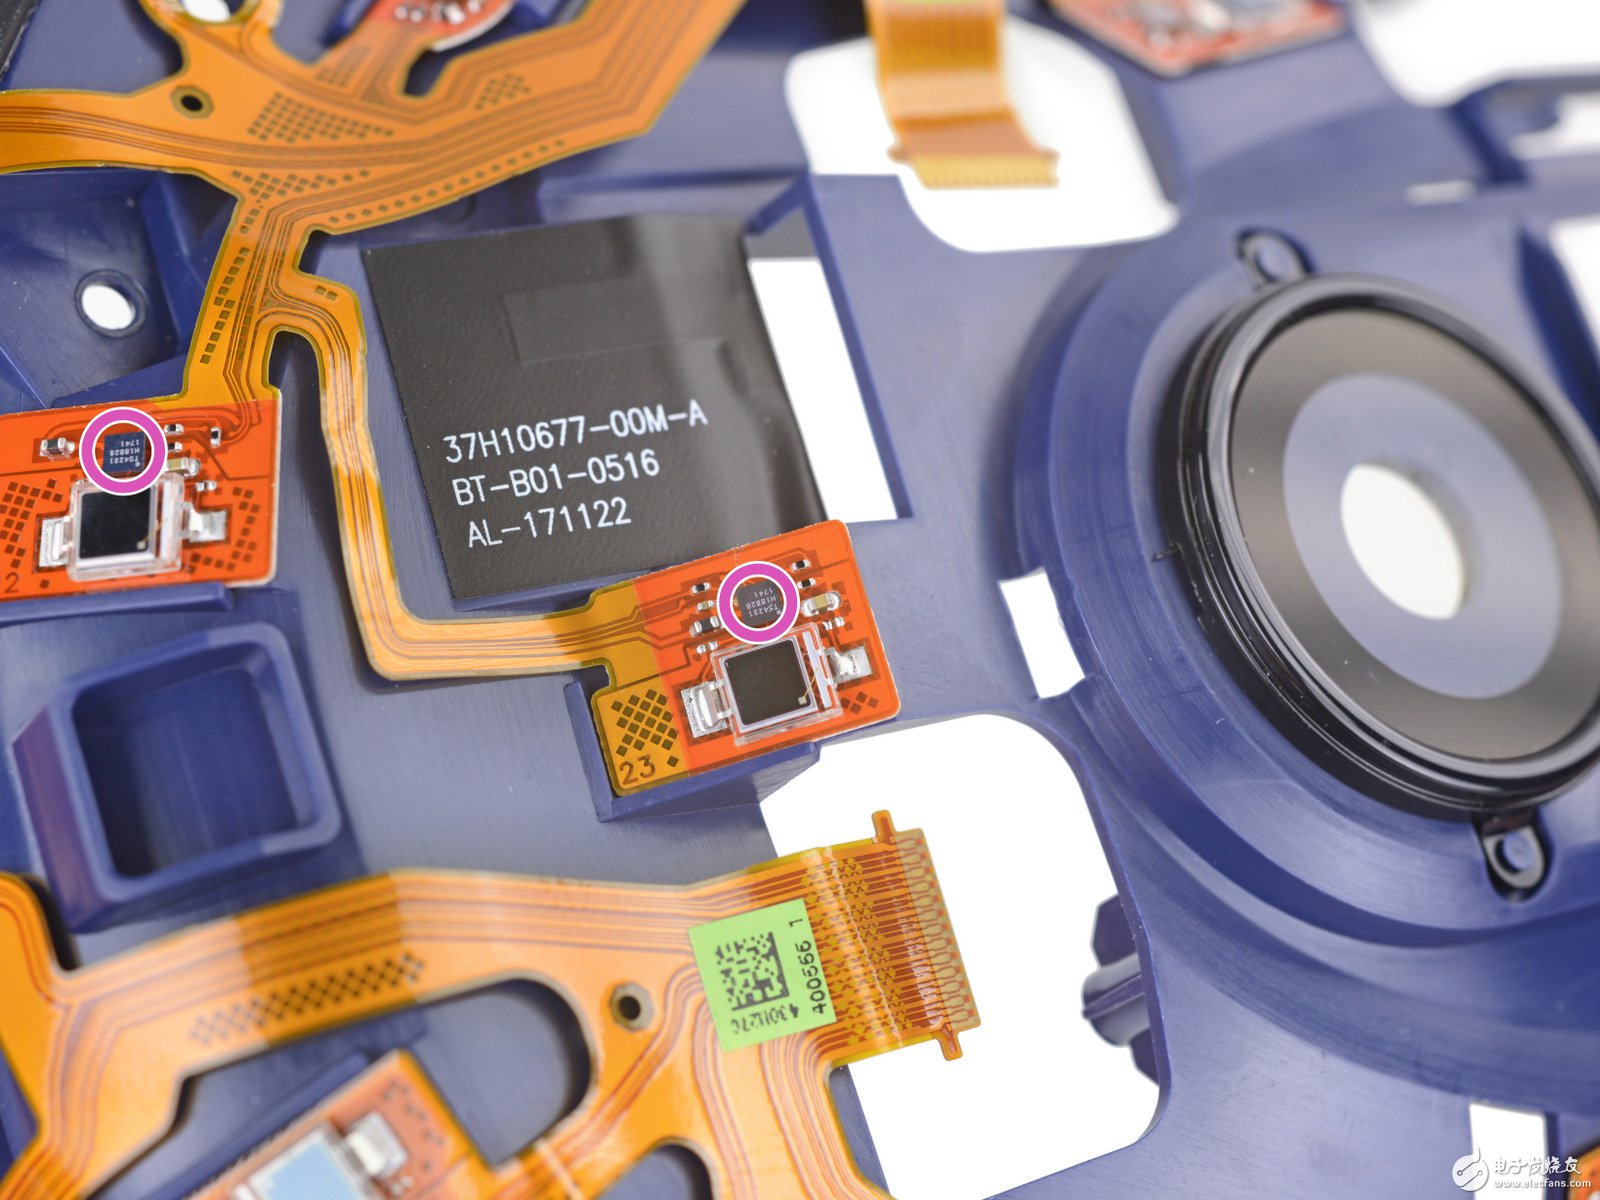
In addition, the Triad Semiconductor TS4231 photoelectric digital conversion IC is embedded in the Vive Pro cable receiver for real-time conversion of infrared pulses into digital signals.
After the front panel is removed, we enter the main body disassembly section of the head display.

By dialing the left and right cables, the other motherboard of the Vive Pro can be separated smoothly. This design with two motherboards is obviously different from the Vive (single motherboard).
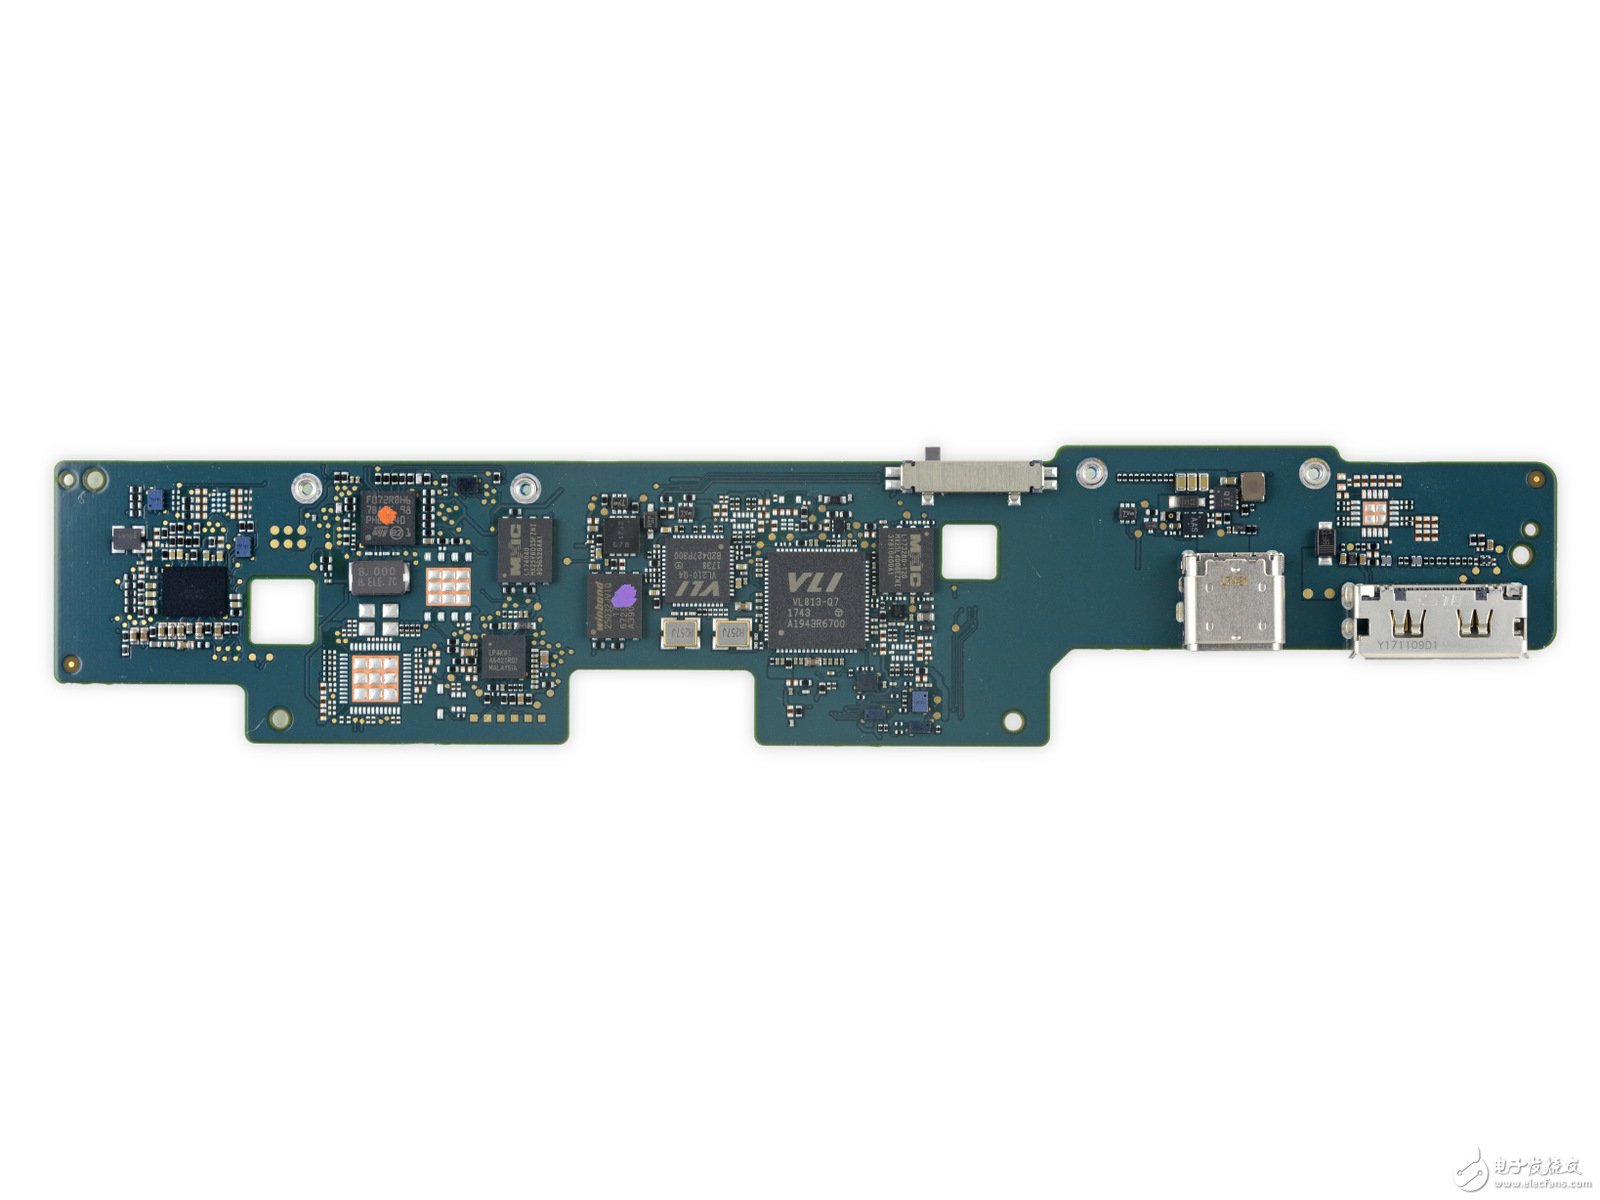
The high price of Vive Pro also has a certain relationship with the materials used in this motherboard. In fact, the main purpose of this motherboard is to display, process graphics and other aspects of data.
There are mainly these components on the front:
Analogix ANX7530 Slimport (4K Ultra HD) Receiver
Cirrus Logic CS43130 High Performance DAC
Cmedia CM6530N USB 2.0 Audio Chip
Texas Instruments TPS54541 Step-Down DC Converter
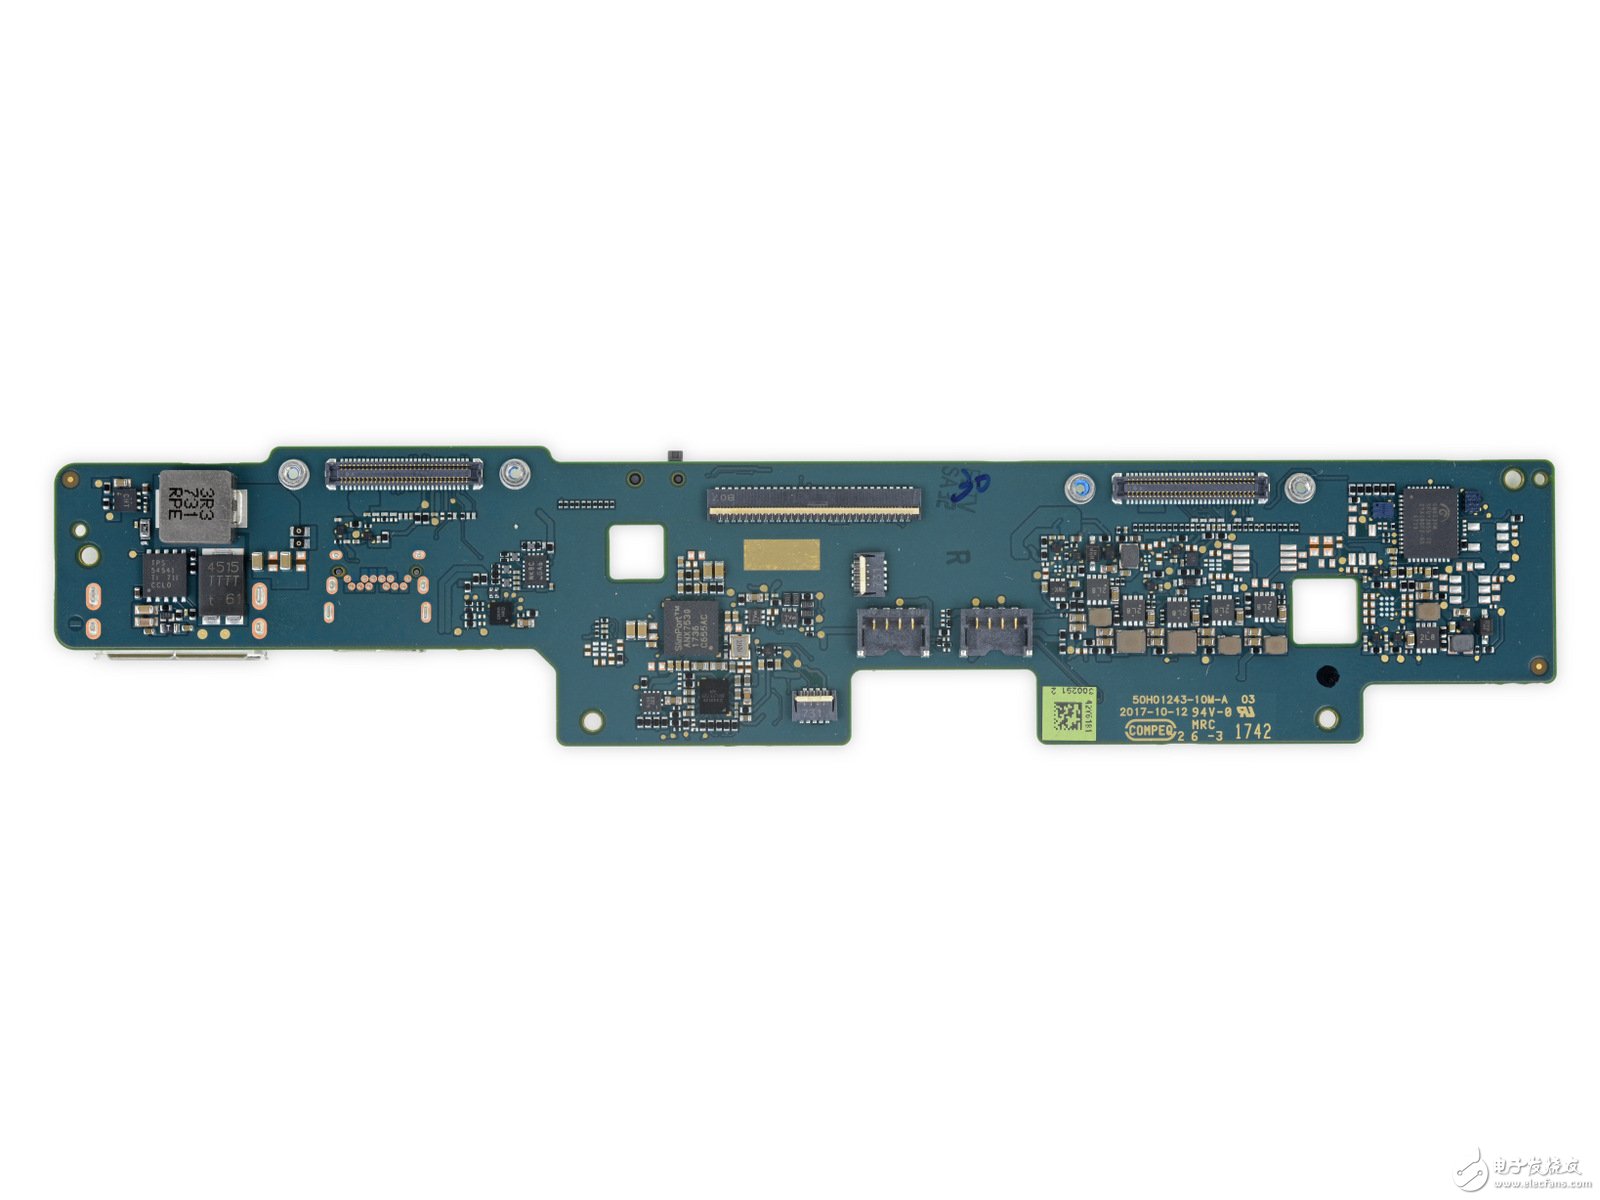
These components are on the back:
Cirrus Logic CS47L90 High Fidelity Audio Codec
STMicroelectronics F072RBH6 ARM Cortex-M0 Microcontroller (same as Vive)
LatTIce Semiconductor LP4K81 Low Power FPGA
Macronix MX25V8035F 8MB CMOS Flash
Winbond 25Q32JV1Q 4MB flash
Via Labs VL210-Q4 and VL813-Q7 USB 3.0 controllers
Macronix MX25L4006E 4MB CMOS Flash
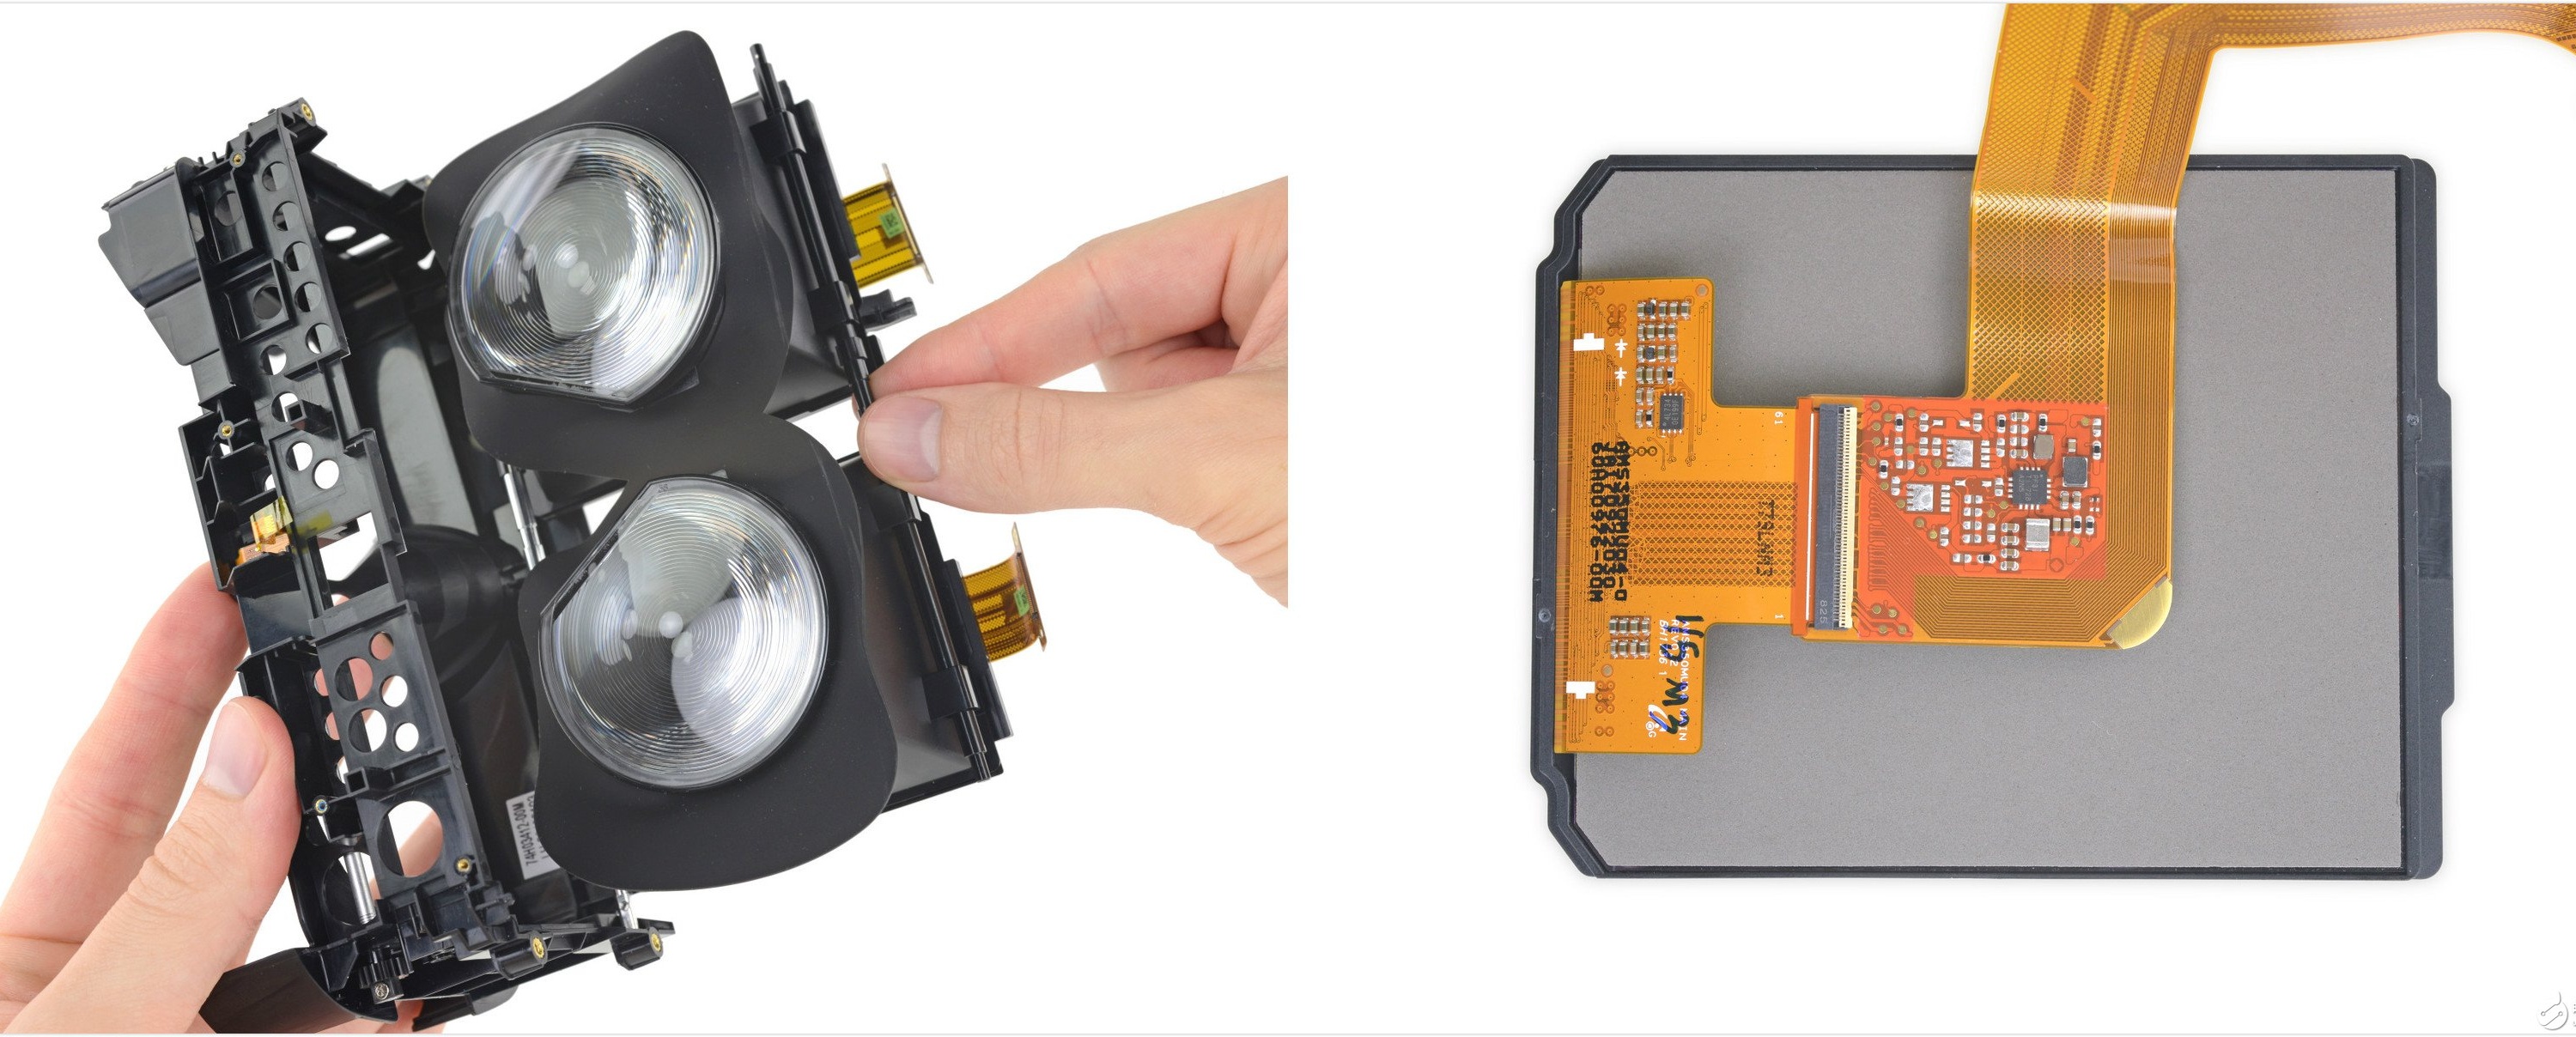
Finally, let's take a look at the display module of Vive Pro. The Vive Pro is still equipped with Fresnel custom lenses, and the rear display panel is replaced by a Samsung 3.5-inch 1600 x 1440 resolution AMOLED screen, model AMS350MU04. According to iFixit, this display panel is identical to the Samsung Odessy MR head panel.
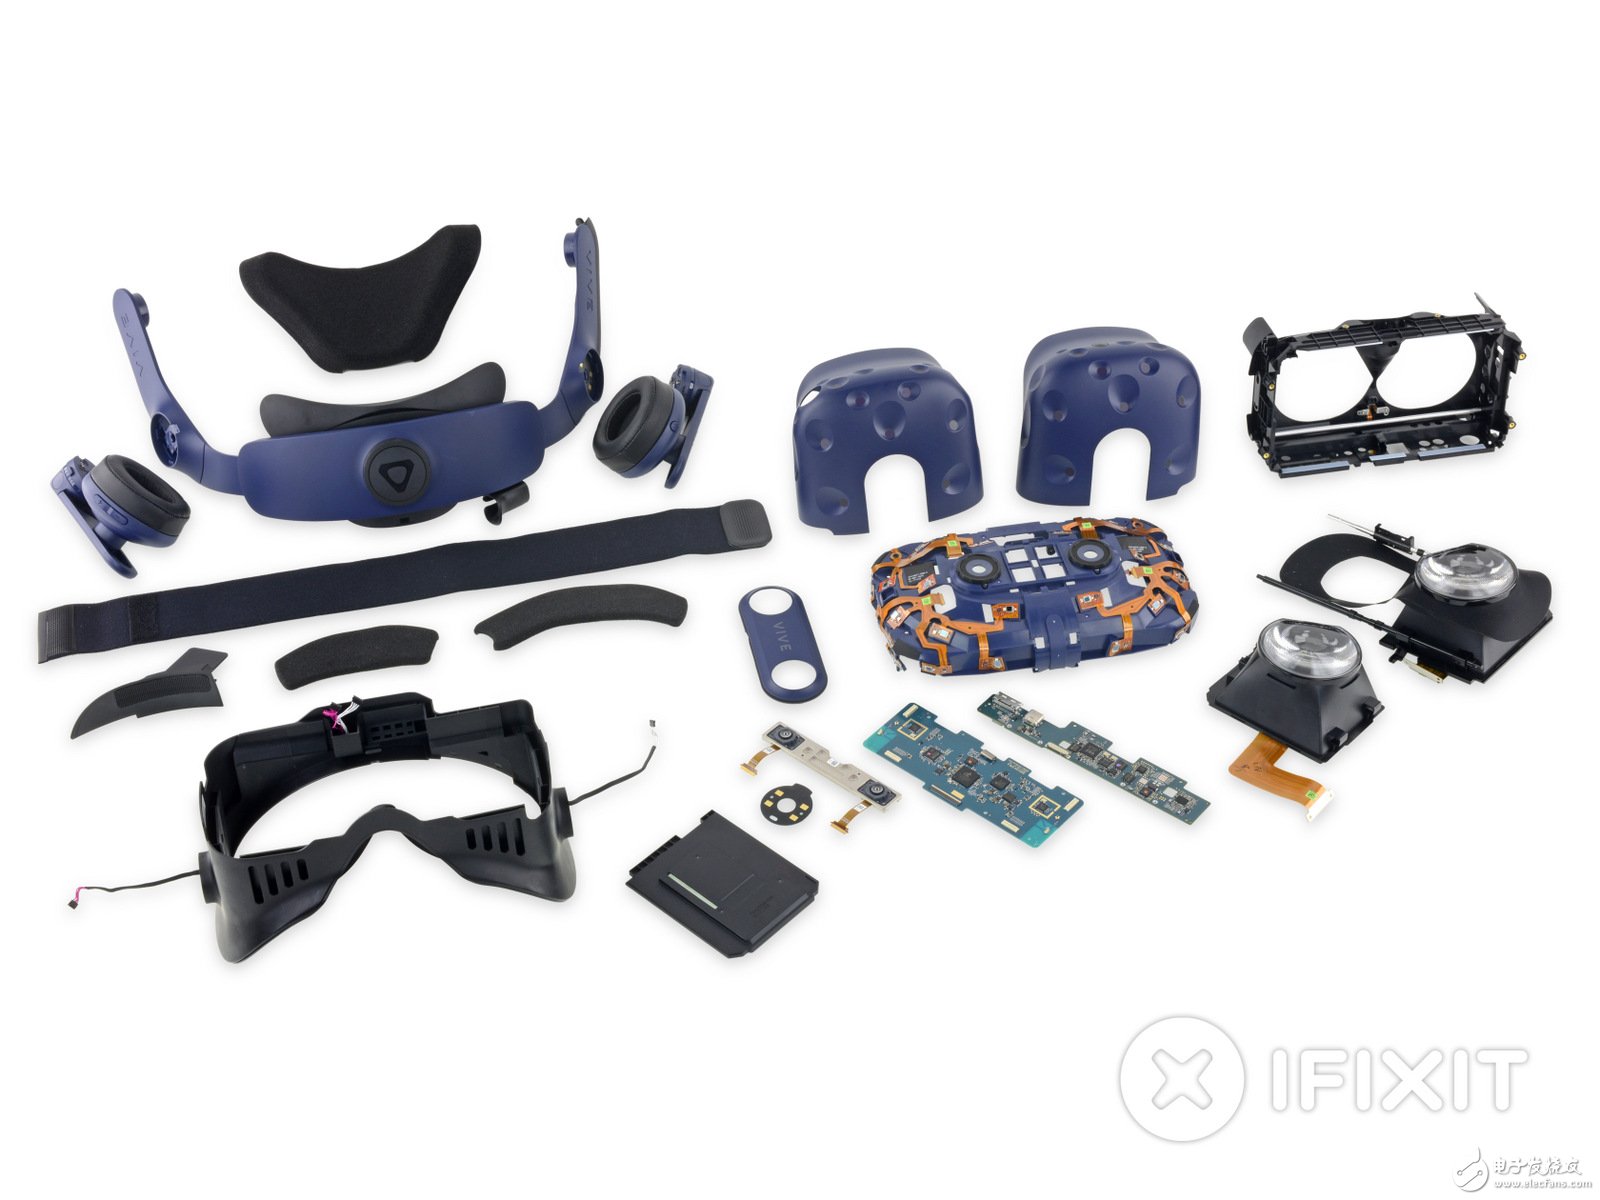
At this point, the disassembly of HTC Vive Pro has finally come to an end. Although it didn't have fewer steps to disassemble than smartphones and tablets, iFixit considered it to be more fixable and eventually gave it an 8 point "serviceability" rating (10 points total) The higher the score, the easier it is to repair).
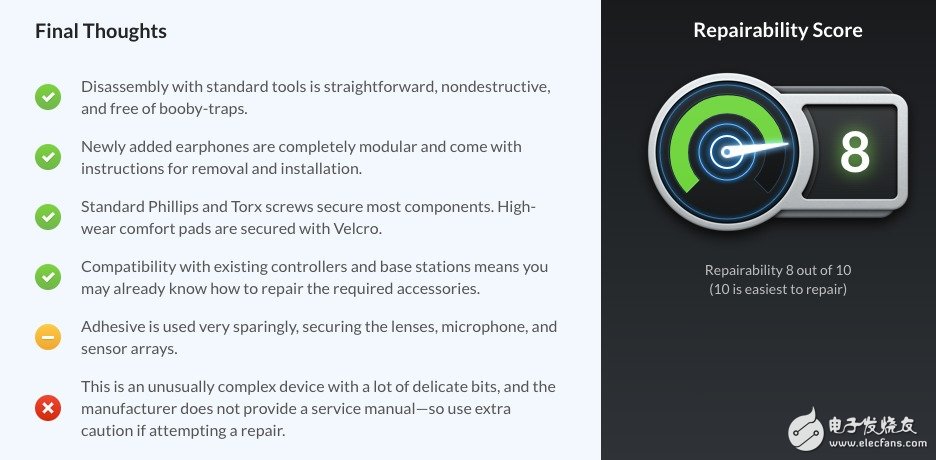
From a maintenance point of view, iFixit believes that the advantages of Vive Pro are:
Simple, damage-free disassembly with standard tools
The headphones are modular in design and officially come with disassembly and installation instructions.
Commonly used screws are used and equipped with a comfortable sponge pad
There are very few parts in the equipment that are glued and easy to disassemble.
But the disadvantage is:
The internal structure is complex, there are many small parts, and there is no maintenance manual attached.
Off-Grid Solar Inverter,Mppt Charger,Multi-Function Inverter,High Frequency Inverters
Shenzhen Unitronic Power System Co., Ltd , https://www.unitronicpower.com